> ## Documentation Index
> Fetch the complete documentation index at: https://docs.request.network/llms.txt
> Use this file to discover all available pages before exploring further.
# No-code payment links
> Generate payment links from the Dashboard UI — no API integration required. Best for freelancers, SMBs, and ops teams.
## What you'll build
A repeatable workflow for sending one-off crypto payment links to customers, contractors, or partners — without writing a line of code. Sign in to the Dashboard with your wallet, set up your receiving destination once, then generate a fresh payment link each time you need to be paid.
**Audience:** freelancers, SMBs, ops teams, anyone receiving low-to-medium volume crypto invoices who doesn't want to host their own checkout.
**Apps used:**
* [Dashboard](https://dashboard.request.network) — sign in, create destination + Client ID, generate links
* [Secure Payment](https://pay.request.network) — what your customer sees when they open the link
## Prerequisites
* An EVM wallet (MetaMask, Coinbase Wallet, WalletConnect) **or** a Tron wallet (TronLink, Guarda, Trust)
* The wallet that will receive payments
## The flow
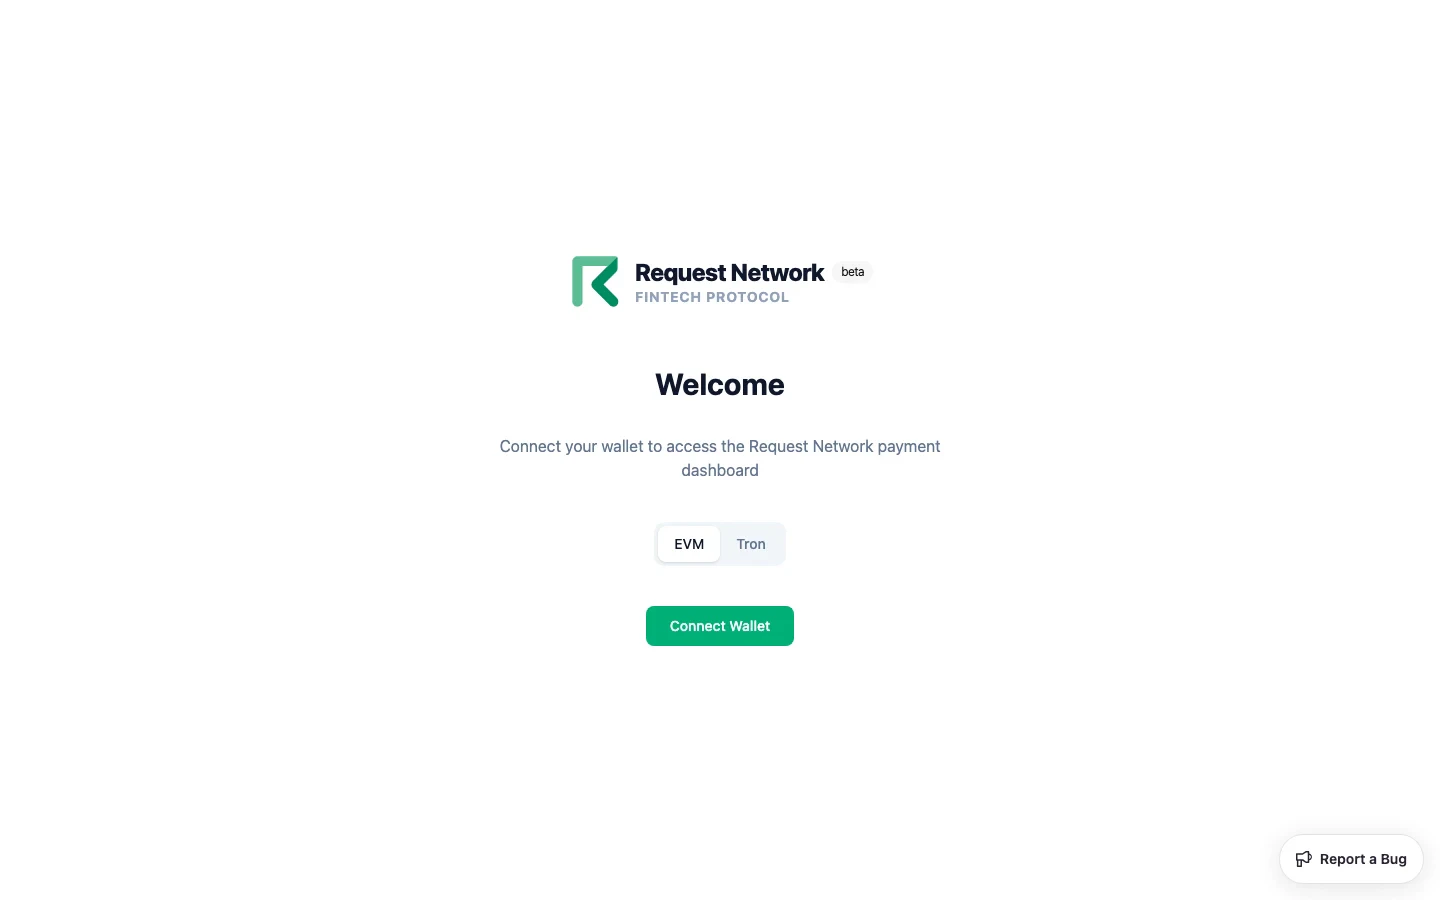
Open [dashboard.request.network](https://dashboard.request.network), connect your wallet, and sign the auth message. Both EVM and Tron wallets work — the Dashboard auto-detects the type and gives you parallel sign-in tabs.
 On the home page, click **Set up payment destination**. Pick the chain (one of 7 EVM chains plus Tron) and the token (USDC and/or USDT — exact catalog varies by chain; see [Supported Chains and Currencies](/resources/supported-chains-and-currencies)). Confirm.
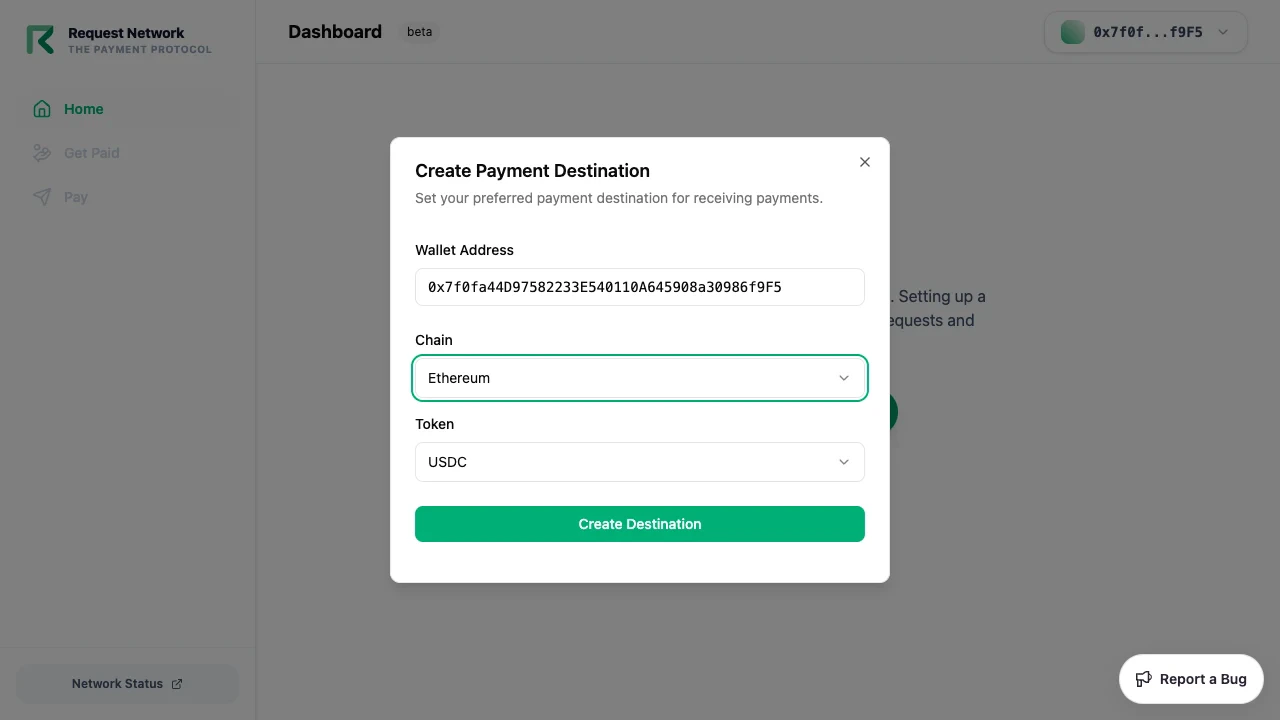 The Dashboard generates a **destination ID** in the ERC-7828 format. You only need to do this once per chain/token combo you want to receive on.
Open **Manage Destination → Client IDs → Generate New Client ID**. Give it a label (e.g. "freelance invoices"). For dashboard-only use, leave **Allowed Domains** empty. Save the generated value.
The Dashboard generates a **destination ID** in the ERC-7828 format. You only need to do this once per chain/token combo you want to receive on.
Open **Manage Destination → Client IDs → Generate New Client ID**. Give it a label (e.g. "freelance invoices"). For dashboard-only use, leave **Allowed Domains** empty. Save the generated value.
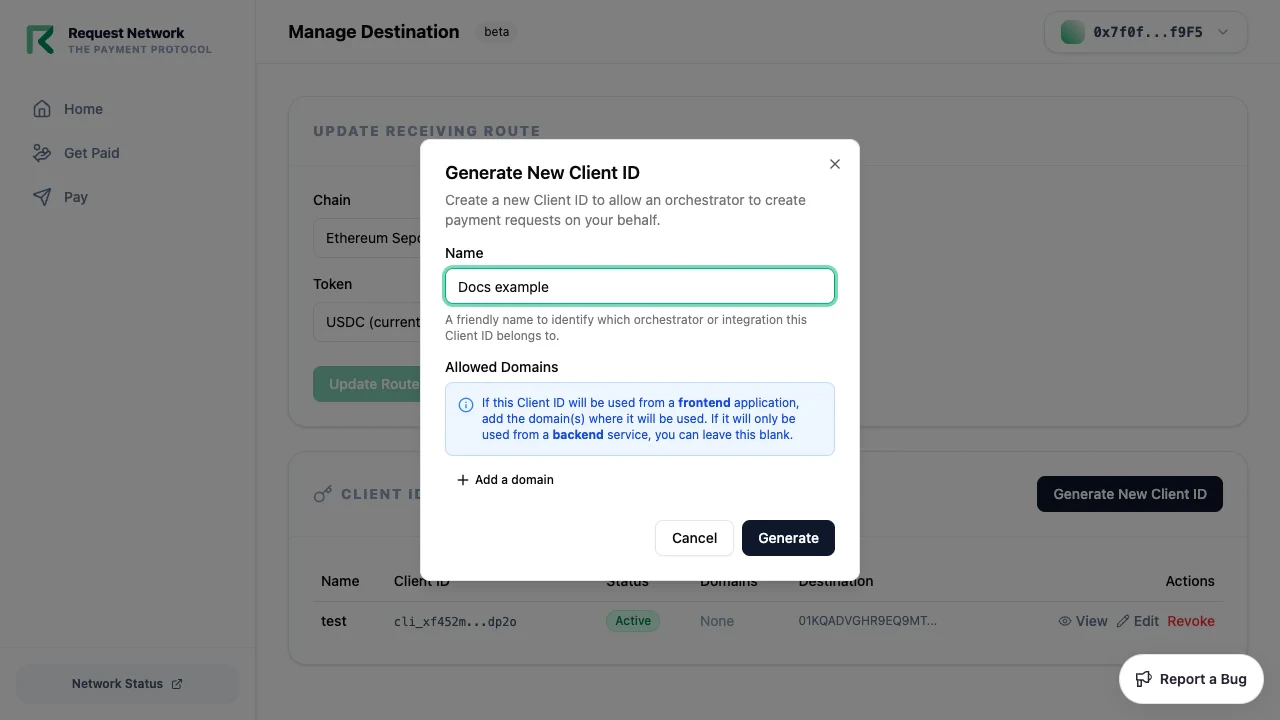 The Client ID is the credential the Dashboard uses on your behalf when you create payment links.
Click **Get Paid → New Request**. Fill in:
* **Amount** — what you want to be paid (e.g. `500`)
* **Reference** — your invoice number or any tracking string
* **Payer identifier** (optional) — your internal order or invoice ID
The Client ID is the credential the Dashboard uses on your behalf when you create payment links.
Click **Get Paid → New Request**. Fill in:
* **Amount** — what you want to be paid (e.g. `500`)
* **Reference** — your invoice number or any tracking string
* **Payer identifier** (optional) — your internal order or invoice ID
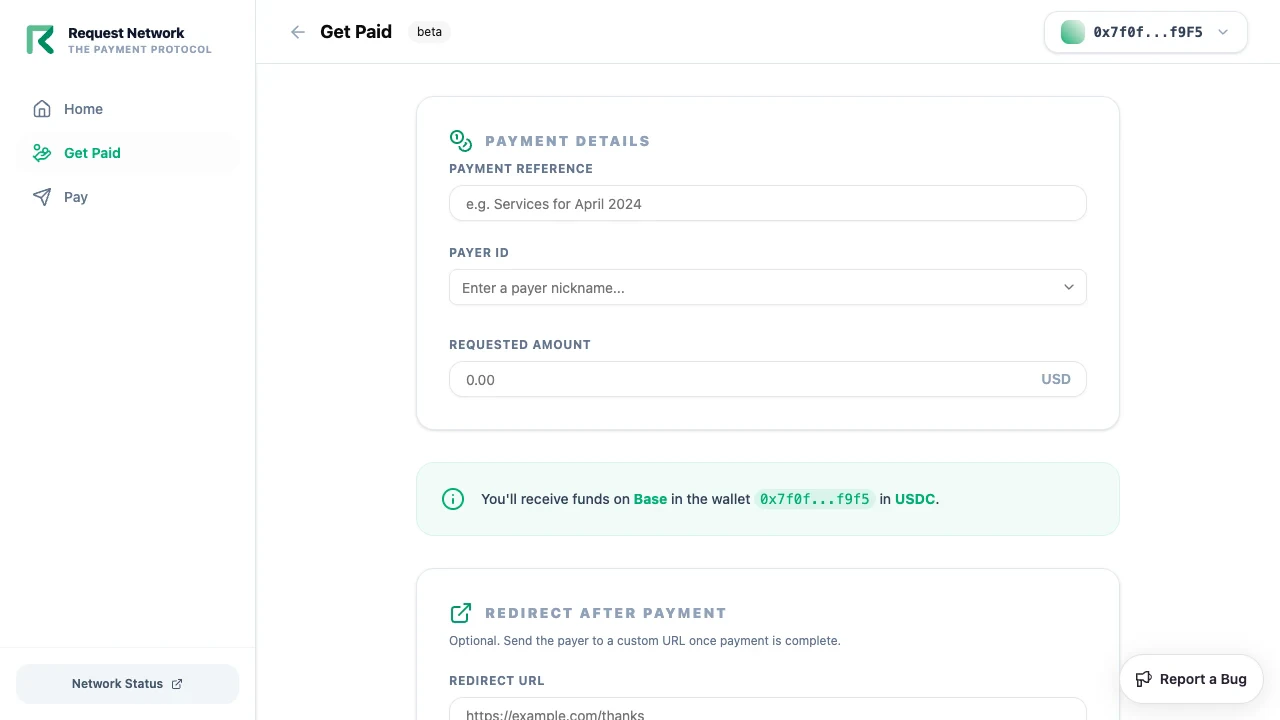 Click **Create**. The Dashboard returns a hosted payment URL on `pay.request.network`.
Send the URL to your customer over email, Telegram, Slack, or paste it into your invoice PDF. They open it in any browser, connect any supported wallet (EVM or Tron, including cross-chain via Li.Fi), and pay.
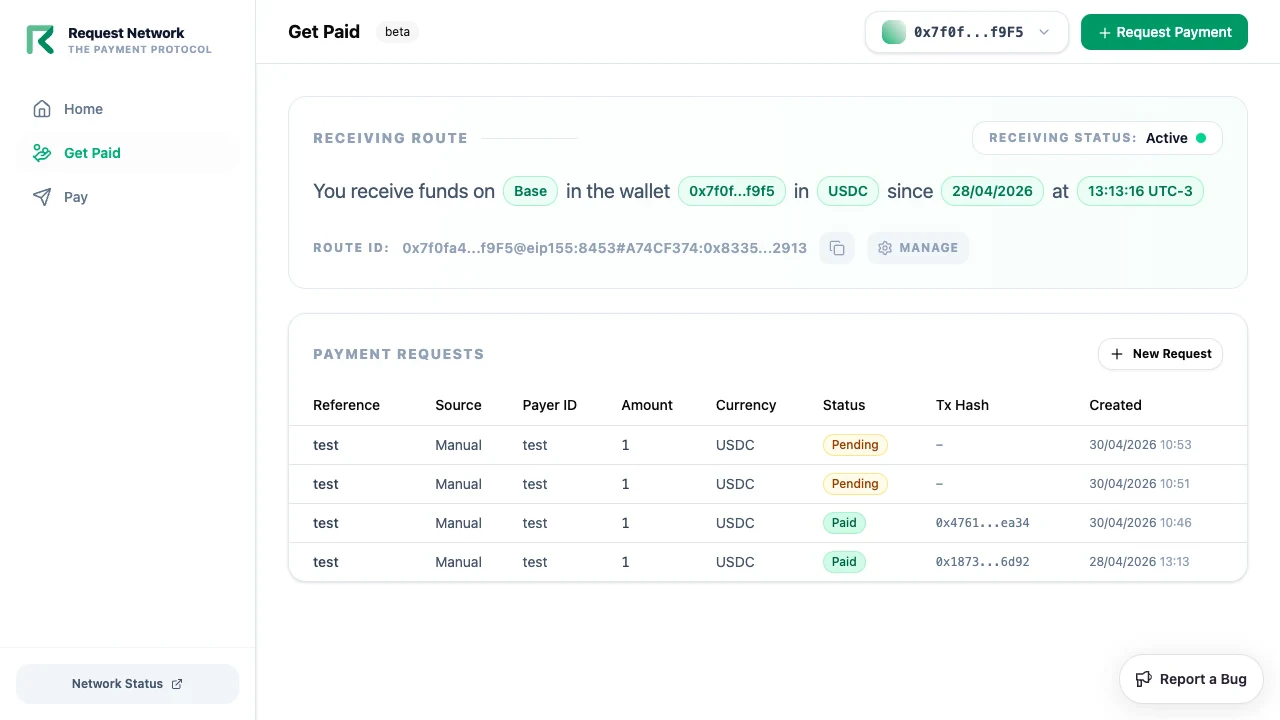
The **Get Paid** list shows status (Pending / Paid) for every link you've created, with on-chain transaction hashes for paid ones.
Click **Create**. The Dashboard returns a hosted payment URL on `pay.request.network`.
Send the URL to your customer over email, Telegram, Slack, or paste it into your invoice PDF. They open it in any browser, connect any supported wallet (EVM or Tron, including cross-chain via Li.Fi), and pay.
The **Get Paid** list shows status (Pending / Paid) for every link you've created, with on-chain transaction hashes for paid ones.
 ## Tron parity
The exact same flow works for Tron. Sign in with TronLink (or Guarda, Trust, WalletConnect-Tron) instead of MetaMask, pick the **Tron** chain when creating the destination, and pick **USDT** or **USDC**. Customers can pay your Tron link from any supported wallet — including paying *to* a Tron destination *from* an EVM wallet via Li.Fi swap-to-pay.
Tron secure payment links are **single-recipient only**. To pay multiple Tron addresses, generate a separate link per recipient.
## When to graduate from no-code
This flow stays low-friction up to \~50 links per month. Beyond that — or if any of the below applies — switch to [programmatic payment links](/use-cases/programmatic-payment-links):
* You want links generated automatically from your invoicing or e-commerce app
* You need to attribute payments to internal user IDs
* You want webhook-driven order fulfillment / accounting (see [Webhook reconciliation](/use-cases/webhook-reconciliation))
* You're paying many recipients at once (see [Batch payouts](/use-cases/batch-payouts))
## Related
Full feature reference for dashboard.request.network.
Same flow with API and webhook details for when you outgrow no-code.
## Tron parity
The exact same flow works for Tron. Sign in with TronLink (or Guarda, Trust, WalletConnect-Tron) instead of MetaMask, pick the **Tron** chain when creating the destination, and pick **USDT** or **USDC**. Customers can pay your Tron link from any supported wallet — including paying *to* a Tron destination *from* an EVM wallet via Li.Fi swap-to-pay.
Tron secure payment links are **single-recipient only**. To pay multiple Tron addresses, generate a separate link per recipient.
## When to graduate from no-code
This flow stays low-friction up to \~50 links per month. Beyond that — or if any of the below applies — switch to [programmatic payment links](/use-cases/programmatic-payment-links):
* You want links generated automatically from your invoicing or e-commerce app
* You need to attribute payments to internal user IDs
* You want webhook-driven order fulfillment / accounting (see [Webhook reconciliation](/use-cases/webhook-reconciliation))
* You're paying many recipients at once (see [Batch payouts](/use-cases/batch-payouts))
## Related
Full feature reference for dashboard.request.network.
Same flow with API and webhook details for when you outgrow no-code.